Multitech MTASR1-100 Guide de l'utilisateur
Naviguer en ligne ou télécharger Guide de l'utilisateur pour Mise en réseau Multitech MTASR1-100. Multitech MTASR1-100 User guide Manuel d'utilisatio
- Page / 42
- Table des matières
- MARQUE LIVRES


- LAN-to-LAN Routing 1
- Branch Office Networks 1
- Quick Start Guide 1
- Contents 3
- Introduction 4
- Related Documentation 5
- Unpacking Your RouteFinder 6
- Cabling your RouteFinder 7
- Changing Shunt Position 9
- Mounting 10
- RouteFinder Software 11
- Loading your Software 11
- Click the Add button 20
- Loading Your Protocol 35
- Installing Your Modem 39
- Limited Warranty 40
- European Community Directives 41
- 82087200 42
Résumé du contenu
LAN-to-LAN Routingfor Central-Site andBranch Office NetworksModel MTASR1-100Quick Start Guide
RouteFinder MTASR1-100 Quick Start Guide5. Pry the shunt out of the default RS232 position, then insertthe shunt in the V.35 position for the WAN link
SoftwareRouteFinder SoftwareThe following software loading procedure does not provideevery screen or option. It is assumed that a technical personwith
RouteFinder MTASR1-100 Quick Start Guide125. Follow the on-screen instructions to install yourRouteFinder software.Press Enter or click Next> to co
SoftwareClick OK to continue.8. The Setup Complete dialog box is displayed. Click theFinish button to continue.9. The following message is displayed.C
RouteFinder MTASR1-100 Quick Start Guide1410. The following message is displayed.Click Yes to download the default setup you’ve justdefined. Clicking
SoftwareRouting Enable check box to disable IPX, then click OKand proceed to step 18.14. Router Name: If this is the only RouteFinder on yournetwork,
RouteFinder MTASR1-100 Quick Start Guide16The WAN network number has to be assigned by thenetwork administrator and must be unique throughout theentir
Software25. If the WAN port is connected to a synchronous device,select Synchronous; the default uses an external clock inthe synchronous device. If y
RouteFinder MTASR1-100 Quick Start Guide18Click OK to proceed.28. The Writing Setup dialog box is displayed as the setupconfiguration is written to th
User Data BaseSetting Up Your Remote User DatabaseThe remote user database lets you gather information about yourremote users. You can add remote user
Quick Start Guide82087200 Revision ARouteFinder (Model MTASR1-100)This publication may not be reproduced, in whole or in part, withoutprior expressed
RouteFinder MTASR1-100 Quick Start GuideClick the Add button.3. The Add Users dialog box is displayed.20
Dial-Up Network4. Build your user database by filling in the following fields foreach user.User Name.The User Name can have as many as 39 characters.
RouteFinder MTASR1-100 Quick Start GuideCall Back DelayCall back delay is editable only if callback security isenabled. This specifies the duration (i
Dial-Up NetworkSetting Up the Dial-up NetworkingSetting up a dial-up network involves checking for hardwarecomponents and if the necessary software is
RouteFinder MTASR1-100 Quick Start Guide24A list of items will appear in a panel under the label Thefollowing network components are installed:.3. If
Dial-Up Network6. Install your modem. If you are using a new modem andhave NOT installed it already, you will need to install itnow, refer to the Inst
RouteFinder MTASR1-100 Quick Start Guide2610. Continue to the next window. Click the Next> button at thebottom of the window.11. In the Telephone n
Dial-Up Network14. Configure your new RouteFinder Dial-up icon.Click your RouteFinder icon that you just created. Click thefile menu button at the top
RouteFinder MTASR1-100 Quick Start Guide16. Select server type. Near the top of the window you will seea Type of Dial-Up Server drop-down list. Select
Dial-Up Network19. Select Specify Name Server address. If the circle to theleft of the Specify Name Server address label does NOThave a dark center,
iiiContentsIntroduction... 4Related Documentation ...
RouteFinder MTASR1-100 Quick Start Guide3022. Select Use default gateway on remote network. If thecircle to the left of the Use default gateway on rem
Dial-Up Network27. Save your Password.Note: This step is OPTIONAL. If you are concerned aboutthe security of your account, do NOT save your password.
RouteFinder MTASR1-100 Quick Start Guide3230. Set the call waiting disabling option. To the right of thelabel is a pull-down menu. Click it and select
Dial-Up NetworkLoading Dial-Up Network Software1. Locate your Windows 95 CD-ROM installation disk orfloppies. Put it in the CD-ROM drive (or your flop
RouteFinder MTASR1-100 Quick Start Guide344. Select Communications. Click the check box to the left ofthe Communications option in the window, so that
Dial-Up NetworkLoading Your Protocol1. From the Control Panel window, click the Network icon.2. From the Network window, click the Add button. TheSele
RouteFinder MTASR1-100 Quick Start Guide363. Open the protocol options window. Double-click theProtocol option. The Select Network Protocol window wil
Dial-Up NetworkLoading Client for Microsoft Networks1. From the Control Panel window, click the Network icon.2. From the Network window, click the Add
RouteFinder MTASR1-100 Quick Start Guide383. Open the client options window. Double-click the Clientoption. The Select Network Client window will appe
Warranty, Service and Regulatory InformationInstalling Your ModemInstall your modem. If you are using a new modem and have NOTinstalled it already, yo
RouteFinder MTASR1-100 Quick Start Guide4IntroductionWelcome to Multi-Tech's new RouteFinder™, model MTASR1-100,an IP/IPX router for interconnect
RouteFinder MTASR1-100 Quick Start Guide40Limited WarrantyMulti-Tech Systems, Inc. (“MTS”) warrants that its products will befree from defects in mate
Warranty, Service and Regulatory Information41NOTE: This equipment has been tested and found to comply withthe limits for a Class A digital device, p
82087200
IntroductionRelated DocumentationThis MTASR1-100 Quick Start Guide is intended to be used byqualified systems administrators and network managers. Thi
RouteFinder MTASR1-100 Quick Start GuideUnpacking Your RouteFinderRemove all items from the box. See Figure 2.MADE IN U.S.AMADE IN U.S.AFigure 2. Unp
CablingCabling your RouteFinderCabling your RouteFinder involves making the proper WAN,Ethernet, Command Port and power connections. Figure 3 showsthe
RouteFinder MTASR1-100 Quick Start Guide8Table 1. Cabling ProcedureStep Procedure1. If the WAN link needs to be changed to a V.35 interface,perform t
CablingChanging Shunt PositionTable 2 provides the procedure for moving the WAN link shuntwhen the RouteFinder is being connected to an external compo
Produits connexes et manuels pour Mise en réseau Multitech MTASR1-100
 (30 pages)
Samsung DM-V599 manuály
Uživatelské manuály a uživatelské příručky pro Základní desky Samsung DM-V599.
Poskytujeme 1 manuály pdf Samsung DM-V599 ke stažení zdarma podle typů dokumentů: Uživatelský manuál
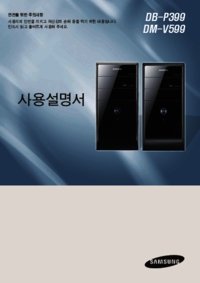
Samsung DM-V599 Uživatelský manuál (90 strany)
Značka: Samsung | Kategorie: Motherboards | Velikost: 9.66 MB |
Tabulka s obsahem
3
14
15
20
22
24
26
29
30
33
34
36
36
37
38
39
41
42
42
51
54
55
55
55
56
60
61
62
63
63
64
66
67
68
70
72
73
74
74
83
84
85
86
88
88
88
89
90
Další produkty a příručky pro Základní desky Samsung
| Modely | Typ Dokumentu |
|---|---|
| DM700A3C | Uživatelský manuál Samsung DM700A3C 사용자 설명서, 117 stránky |
| DM-X15 | Uživatelský manuál Samsung DM-X15 사용자 설명서 [da] [sv] , 164 stránky |
| DM500S3A | Uživatelský manuál Samsung DM500S3A 사용자 설명서, 126 stránky |
| MZ30 | Uživatelský manuál Samsung MZ30 사용자 설명서 [sk] , 113 stránky |
| SPH-P9200 | Uživatelský manuál Samsung SPH-P9200 사용자 설명서, 108 stránky |
| MP30 | Uživatelský manuál Samsung MP30 사용자 설명서, 120 stránky |
| NP300V4ZH |
Uživatelský manuál
 Samsung NP300V4ZI Používateľská príručka,
80 stránky
Samsung NP300V4ZI Používateľská príručka,
80 stránky
|
| NT910S3GI | Uživatelský manuál Samsung NP905S3GI 사용자 설명서, 129 stránky |
| DM-Z66 | Uživatelský manuál Samsung DM-Z66 사용자 설명서, 110 stránky |
| DM300S1A | Uživatelský manuál Samsung DM301S1A 사용자 설명서, 112 stránky |
| SQ25 |
Uživatelský manuál
 Samsung SQ25 User manual [da] ,
134 stránky
Samsung SQ25 User manual [da] ,
134 stránky
|
| DM-Z60 | Uživatelský manuál Samsung DM-Z60 사용자 설명서, 180 stránky |
| SQ20 |
Uživatelský manuál
Samsung SQ20 User manual,
131 stránky
|
| NT500R5QJ | Uživatelský manuál Samsung NT500R5QJ User Manual (Windows 7), 92 stránky |
| DM500T4Z | Uživatelský manuál Samsung DM500T4Z 사용자 설명서 [en] , 80 stránky |
| DB400T2Z | Uživatelský manuál Samsung DB400T2Z 사용자 설명서, 85 stránky |
| ZDZ25 | Uživatelský manuál Samsung ZDZ25 사용자 설명서, 86 stránky |
© 2020, manymanuals.fr. Tous droits réservés | 0.034 s |
 Manymanuals.com
 Manymanuals.de
 Manymanuals.fr
 Manymanuals.it
 Manymanuals.pl
 Manymanuals.cz
 Manymanuals.es
 Manymanuals-pt.com
Commentaires sur ces manuels